

How do I install titanium fasteners correctly?
As a trusted supplier of titanium fasteners, I am often asked about the correct way to install these high - performance components. Titanium fasteners are known for their excellent strength - to - weight ratio, corrosion resistance, and high - temperature performance. However, to fully leverage these benefits, proper installation is crucial. In this blog post, I will guide you through the process of correctly installing titanium fasteners.
Pre - installation Preparation
Before you start the installation process, it is essential to ensure that you have all the necessary tools and materials. You will need a torque wrench, which is a must - have for accurate tightening. Using a torque wrench helps prevent over - tightening or under - tightening, both of which can lead to issues such as joint failure or loosening over time.
Inspect the fasteners and the mating parts carefully. Look for any signs of damage, such as cracks, burrs, or deformation on the fasteners. For the mating parts, check the holes to ensure they are clean, the correct size, and free of debris. A dirty or mis - sized hole can cause problems during installation and affect the performance of the fastener.
Another important aspect is the lubrication. Titanium fasteners typically require lubrication to reduce friction during installation. Friction can cause galling, which is a form of adhesive wear that can damage the fastener and the mating parts. A suitable lubricant can minimize this risk. There are specialized lubricants available for titanium fasteners, and it is recommended to use them according to the manufacturer's instructions.
Installation Steps
Step 1: Alignment
Proper alignment of the fastener with the mating hole is the first step. Insert the fastener into the hole gently. Make sure it goes in straight; any misalignment can cause cross - threading, which will damage the threads on both the fastener and the mating part. If you encounter resistance while inserting the fastener, do not force it. Instead, remove the fastener and check for any debris or misalignment in the hole.
Step 2: Hand - tightening
Once the fastener is properly aligned, start by hand - tightening it. This helps to ensure that the threads engage correctly and that the fastener is seated properly. Turn the fastener clockwise until it is snug, but do not over - tighten at this stage. Hand - tightening gives you a feel for the fit and allows you to make any necessary adjustments before using the torque wrench.
Step 3: Torque Application
After hand - tightening, it's time to use the torque wrench. Refer to the manufacturer's specifications for the correct torque value. The torque value depends on several factors, such as the size of the fastener, the type of application, and the material of the mating parts. Set the torque wrench to the specified value.
Place the torque wrench on the fastener and apply a slow, steady force in a clockwise direction. As you approach the set torque value, the torque wrench will give a signal (usually a click or a change in resistance), indicating that you have reached the correct torque. Stop applying force immediately to avoid over - tightening.
Step 4: Final Inspection
Once the fastener is tightened to the correct torque, perform a final inspection. Check that the fastener is flush with the mating surface and that there are no visible signs of damage or deformation. Verify that the joint is secure and that there is no movement or play.
Specific Considerations for Different Types of Titanium Fasteners
Titanium Nylon Self - Locking Hex Nut
The Titanium Nylon Self - Locking Hex Nut is designed to provide a reliable and vibration - resistant connection. When installing this type of nut, pay special attention to the nylon insert. The nylon insert is what provides the self - locking feature, and it should be in good condition.
Insert the nut onto the bolt by hand, making sure the nylon insert is facing the correct direction. As you hand - tighten the nut, you will feel a slight increase in resistance due to the nylon insert. When using the torque wrench, follow the recommended torque value for this specific nut. Over - tightening can damage the nylon insert and reduce its self - locking effectiveness.
Gr5 Titanium Hex Flange Nut
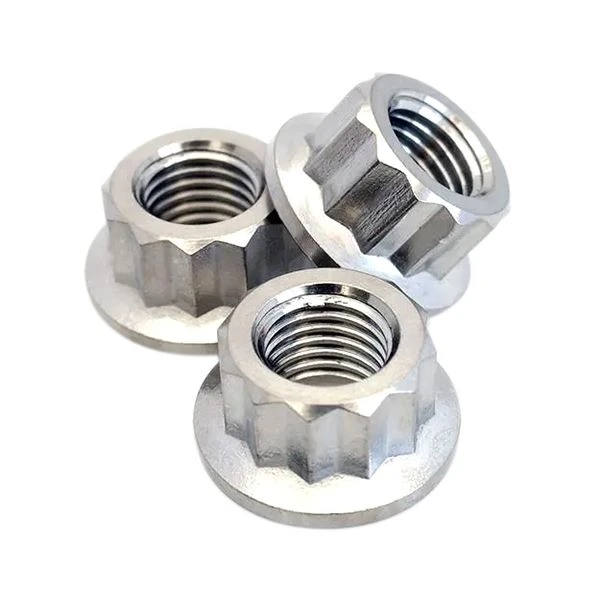
The Gr5 Titanium Hex Flange Nut is made of Grade 5 titanium, which is a high - strength alloy. This nut has a flange that provides a larger bearing surface, distributing the load more evenly.
During installation, ensure that the flange is seated properly against the mating surface. The flange helps to prevent the nut from loosening and provides better stability. Follow the standard installation steps, including proper alignment, hand - tightening, and torque application. The torque value for a Gr5 titanium hex flange nut may be different from other types of nuts, so always refer to the manufacturer's specifications.
Titanium Anodizing Bolts For Bicycle
Bicycle Titanium Anodizing Bolts are often used in the bicycle industry due to their lightweight and corrosion - resistant properties. When installing these bolts, it is important to consider the delicate nature of bicycle components.
Use a torque wrench with a lower torque range to avoid over - tightening and damaging the bicycle parts. The anodized coating on these bolts not only provides an aesthetic appeal but also offers some protection against corrosion. However, be careful not to scratch the coating during installation, as this can reduce its protective effect.
Troubleshooting
Even with careful preparation and installation, you may encounter some issues. If you experience cross - threading, stop immediately. Do not try to continue tightening the fastener, as this will only make the problem worse. Remove the fastener and inspect the threads. If the damage is minor, you may be able to clean and re - thread the hole or replace the fastener.

If the fastener is difficult to remove after installation, it could be due to galling. In this case, applying a penetrating oil and allowing it to soak for some time may help. Use a proper tool, such as a socket wrench, to remove the fastener slowly and carefully.
Conclusion
Installing titanium fasteners correctly is a multi - step process that requires attention to detail and the use of the right tools. By following the steps outlined in this blog post, you can ensure a secure and reliable connection. Whether you are using Titanium Nylon Self - Locking Hex Nut, Gr5 Titanium Hex Flange Nut, or Titanium Anodizing Bolts For Bicycle, proper installation is key to maximizing the performance of these high - quality fasteners.
If you are in the market for titanium fasteners or have any questions about their installation, we are here to help. Our team of experts can provide you with the right advice and high - quality products. Contact us for more information and to start a procurement discussion.
References
- "Fastener Installation Guide" - Industry Standard Publication
- Manufacturer's Manuals for Titanium Fasteners
- Technical Papers on Titanium Fastener Applications